CPR Synopsis
CPR (Cardiopulmonary Resuscitation):
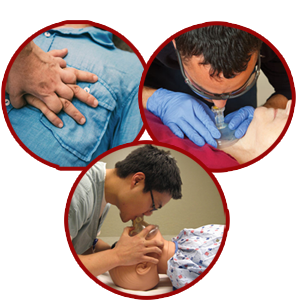
A victim suffering from cardiac arrest is not getting enough oxygen carried to the brain and other vital organs. CPR is a combination of rescue breaths and external chest compressions to deliver oxygen to the brain to keep it alive.
Rescue breaths deliver oxygen to the lungs. Chest compressions squeeze the heart and circulate the blood from the heart to the lungs to get oxygen. The heart refills with blood between each compression. Continuous compressions deliver oxygen all over the body. High-quality chest compressions are the most vital process of CPR.
CPR Barriers:
The risk of getting contaminated while providing rescue breaths is very low. However, many people are not comfortable with providing mouth-to-mouth rescue breaths. CPR barriers can prevent exposure to the blood or body fluids of a victim. A face mask comes with a filtered valve that lets air to enter but prevents the backflow of the fluids. Pick the right size mask to form a seal and provide effective rescue breaths. Apply the mask with the narrow end, on the nose bridge. Firmly press the mask to the victim‘s face and raise the chin to open the airway. A face shield has a built-in fitter or one-way valve. Position the shield with the filter or valve over the victim's mouth. Pinch the nose to provide rescue breaths.
Adult CPR
Check and CALL:
Check victim's response and call 911:
Tap the shoulder of the victim and shout. If there is no response, call for help. Tell a bystander to call 911 and get the AED. If you are alone, call 911 and get the AED yourself. Return quickly. Use your own phone to call 911 and put it on speaker mode to allow the emergency dispatcher to give you instructions.
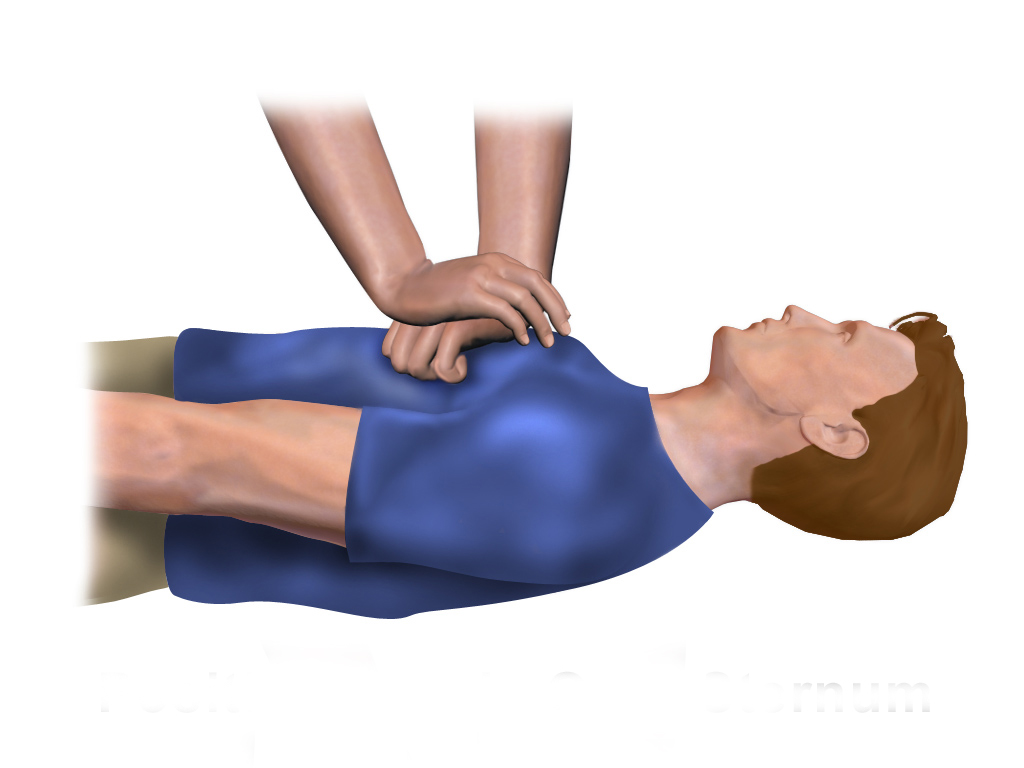
Give Compressions:
Use 2 hands to give 30 chest compressions:
Lay the victim face up on a flat and firm surface.Quickly take the clothing off the victim‘s chest. Position your hands in the center of the chest. Compress the chest 30 times. Provide high-quality compressions.
CPR Do‟s And Don‟ts
Hypothermia: The metabolism of the body slows down in a cold environment and reduces the requirement for oxygen. This situation can lengthen the amount of time in which CPR can be successful. Never assume it is too late to start CPR.
Electrical shock: The victim of an electrical shock could abruptly stop breathing or suffer from cardiac arrest. Observe the scene before you enter. Ensure that the power source has been turned off prior to checking the victim.
Compression-only CPR:
This method is used on an adult victim if a rescuer is less experienced in standard CPR or is not willing to offer rescue breaths because of blood or injury to the mouth of the victim.
Mask-to-stoma rescue breathing:
This technique is used if a victim has a stoma. Stoma stands for a surgically-created opening at the base of the throat to allow breathing. If possible, close the victim‘s mouth and pinch the nose to minimize air loss.
Mouth-to-Nose rescue breathing:
This technique can be used if the jaw or mouth of the victim is badly damaged. Make sure to hold the mouth of the victim closed to minimize air loss.
Child CPR
Child CPR: In children, the cardiac arrest usually occurs due to respiratory arrest and not due to a heart problem. Common causes include poisoning, injury, drowning, choking, and asthma.
Infant CPR
Infant CPR: In infants, cardiac arrest usually occurs due to respiratory arrest and not from a heart ailment. Common reasons include injury, choking, respiratory ailment and SIDS. When CPR is given instantly, a rescuer might be able to restore normal breathing without using an AED.
Infant Age: Less than 1 year old
- Check for response and call 911
- Check for breathing
- Give Chest Compressions
- Open the airway
- Give 2 rescue breaths
- Resume cycles of 30 compressions and 2 rescue breaths
AED Synopsis
AED stands for Automatic External Defibrillator, which is a computerized device that can examine a victim‘s heart rhythm, and accordingly deliver an electrical shock to restore a heartbeat. AED provides directions via visual indicators and voice prompts. The device is quite safe and simple to use. AED will not deliver a shock if the victim doesn‘t need one. It will only shock a victim whose heart is in a shock-able rhythm.
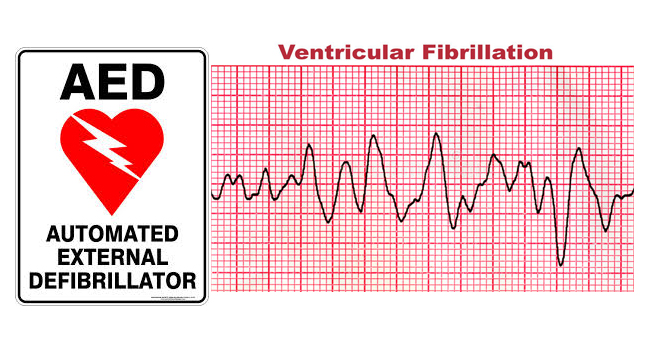
Ventricular Fibrillation (V-fib): When the victim‘s heart is injured or not receiving sufficient oxygen, it can stop beating and become besieged with a disordered electrical activity called Ventricular Fibrillation (V-fib).
Normal Electrical Rhythm after AED USE:When the AED device detects V-fib, it transmits a powerful electrical current through the heart, which briefly stops the disordered electrical activity. This activity restores a heartbeat and allows the heart to continue its normal electrical rhythm.
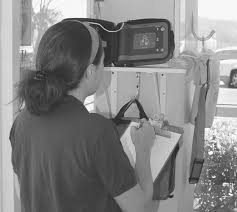
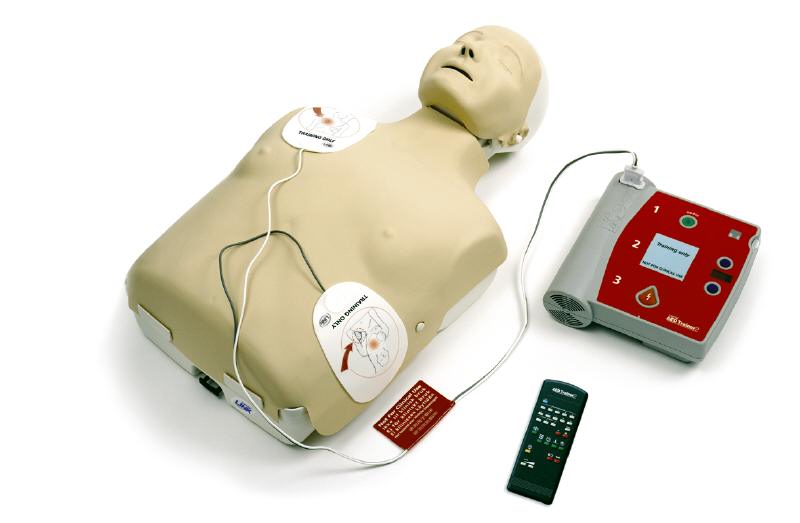
AED Use
Use an AED as soon as it is available. Put the AED near the head of the victim and switch it on by pushing a button, pulling the handle or lifting the lid. Follow the AED prompts.
Remove or cut the clothing (e.g. shirt or a bra) from the chest area to expose it. If wet, wipe the chest. Apply the pads to the chest by following the pictures at the back of the pads.
- Peel off the AED pads.
- Apply1 pad on the right side of the chest, just beneath the collarbone.
- Apply the other pad on the lower left side of the chest.
- Connect the pads to the AED. Some pads remain pre-connected to the AED.
If 2 trained rescuers are present, one can use the AED while the other can perform the CPR. The one using the AED applies the pads around the hands of the other rescuer providing chest compressions. Don‘t stop the CPR process while the other rescuer is preparing the AED for use. The AED will prompt you to halt CPR when it is ready to examine the heart rhythm.
AED Do‟s And Don‟ts
Placing AED Pads:
Chest hair can restrict the contact between the skin and the pads. These can stop the AED from analyzing the heart rhythm and giving a shock. Shave the chest in the area of pad placement using a razor. Other alternative is to first apply an extra set of AED pads tightly to the chest, then pull them off quickly, and apply a new set of AED pads.
An implanted device, for instance, a pacemaker may seem like a hard, small lump under the skin. If the person has an implanted medical device, apply the AED pad at least 1 inch away from it.
Do not place an AED pad over a medication patch (if the patch is applied to the skin). Use gloved hands to remove the patch, use a towel to wipe the chest clean, and then place the AED pad.
AED Maintenance and Troubleshooting:
Stock up a ready to use AED, close to professional rescuers. Also store an accessory kit and extra pads with the AED. Carry out regular inspections in line with the local protocols and manufacturer‘s guidelines. Ensure that the batteries and pads have not expired, and the unit is not visibly damaged. If the AED detects a trouble, it will prompt you to troubleshoot:
Low battery: Replace it.
Check AED Pads: Check the cable connection; Press down firmly on the pads, or change the pads.
Movement: Never touch the victim when the AED is examining the heart rhythm.